Counting and Measuring Objects in an image
Use the Count/Size tools to count and measure objects in an image. An "object" is considered to be any contiguous group of pixels that share a specified range of intensity values. You can use the Count/Size commands to identify, count, and measure these objects. Click here for more information.
In the following example, we will count the number of dark objects in the bldcells.tif demo image:
Open the bldcells.tif image in the workspace:
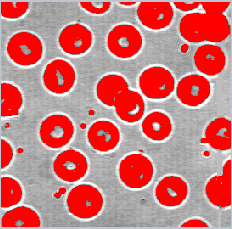
Go to the Count/Size tab and, from the Segment group, choose Dark.
This tells Image-Pro to automatically determine the range of intensities shared by most dark objects in the image. The dark objects will be automatically highlighted by the default Threshold Tool overlay color.
Click on the Split tool's down-arrow to show the drop-down menu, and choose Auto Split All.
This option allows Image-Pro to automatically separate objects that are touching or overlapping.
Click on the Options tool.
The Measurements Options dialog box is displayed.
You can have Image-Pro find the whole objects, or you can have it find other object selections, such as their Convex Hulls, Holes, and so on.
In the Count Options group, select what you want Image-Pro to find. Click here for more information.
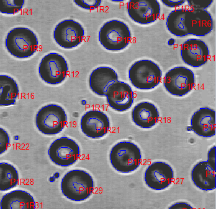
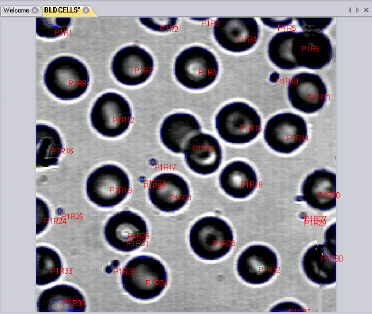
On the Count/Size ribbon, click on the Count button.
The counted and numbered objects will appear on the image:
Now that we’ve counted the blood cells, we’re going to sort them.
Select Sort from the Image group on the Count/Size tab, and choose Create Sorted Objects Image from the pull-down menu.
A new image is created with the blood cells sorted (in this case, from largest to smallest).
